An introduction to Xamarin for cross platform Mobile development
As I already said in my previous post here, Xamarin would be the first choice for many when it comes to cross platform mobile development, Since it has a large community to give a lot of suport, and has unique targeted design features for Android, IOS and Windows.
Xamarin needs Visual Studio to work with. Visual Studio is an integrated development environment (IDE) from Microsoft that people from a windows development base would not need an explanation on this. Xamarin is a plugin for Visual Studio, and can be installed in few easy steps.
All you need to know is a little C# to create multi platform apps.
Developers coming from Android or a Java background don’t need to panic on this, since C# is similar to Java with a few exceptions and Syntax. However, It can potentially help you save a large amount of time by allowing you to make apps using a single programming code base.
Xamarin is now the first choice among all the popular cross-platform options available. The C# codebase allows a native windows programmer to develop a cross platform mobile app at no time, whereas people from Android Studio background may also find it a more lenient way than Java. Because of the native compilation style of Xamarin, it has become so easy to develop a native-looking material design app or a native looking IOS app with a little bit of programming.
Using Xamarin framework doesn’t mean you are using all the Google features directly. It takes a few steps to integrate some such features, and the same applies while you try to import a java library. It’s a little more tedious compared to Android Studio but still it is worthy since it is possible to do. Always there are workarounds in Xamarin to attain a native app, thus making it the first among all the cross platform Mobile frameworks. Yet there is another problem in Xamarin, when it comes to platform updates, which may affect the library versions too. Because of these downs, cross platform development becomes boring at times. Apart from this minor issues, Xamarin still is the choice for many.
How to Setup Xamarin for Android development
First you will need to install Visual Studio. You can download the latest version for free from their official portal https://www.visualstudio.com/downloads/
From Visual Studio 2017 version, Xamarin comes with the download itself.
In case, if you’re already having an older version of Visual Studio like 2013 or 2015, you would need to setup Xamarin manually by following the below steps.
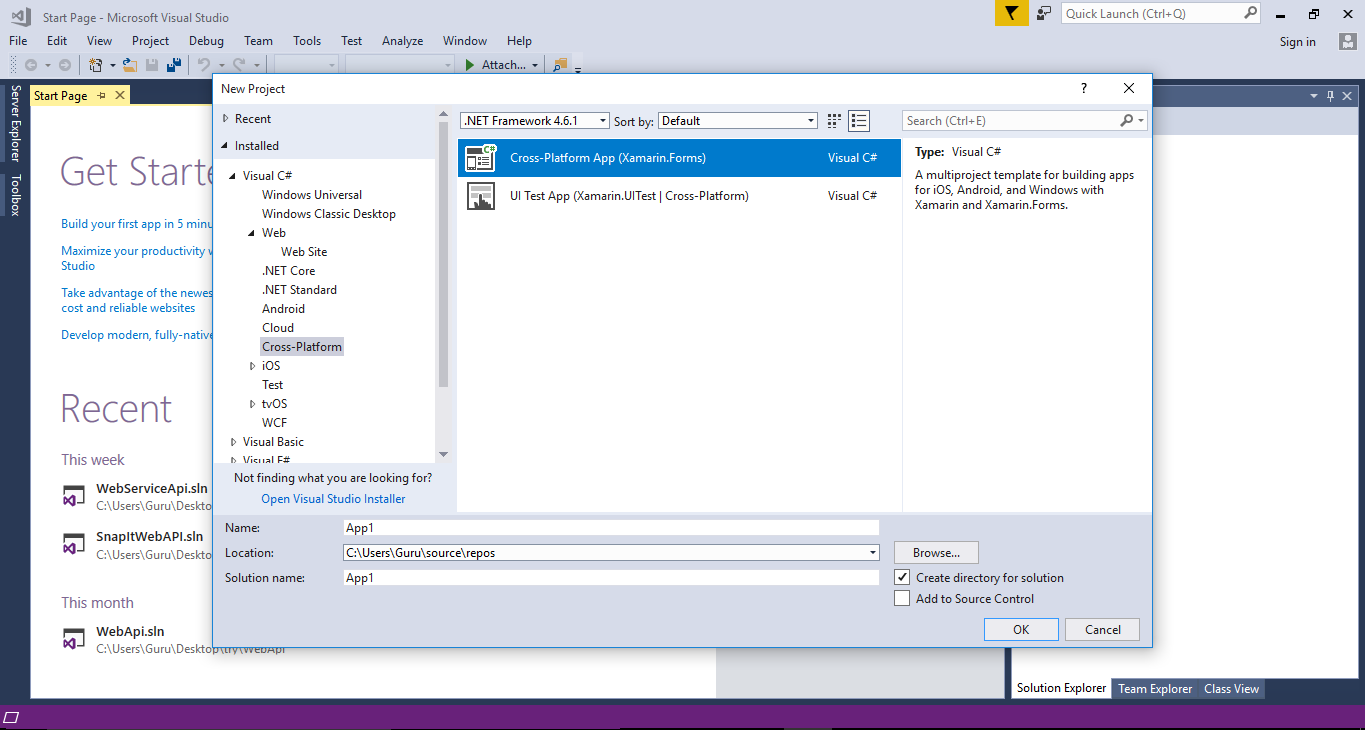
Start up the IDE and click ‘New Project’ to start a project. Mostly you will see the option to select ‘Android’ on the left under Templates > Visual C# > Android. Now choose ‘Build native Android apps in C#’.
It will ask you to install Xamarin on the next page
Simply follow the steps and get your way around. It might take a good network connection to download the extensions until the installation.
By any instance, if that option is not displayed in Visual Studio, you may go to Xamarin downloads page and download the installer file for Windows and continue installing the extension from there. This will install Xamarin and all the other required components such as the Android SDK, emulator, System images, and more. You may also see the options of additional components like Xamarin notebooks, NDK, and more.
I highly suggest you to uncheck the options for NDK, language support, workbooks, emulators and system images, else it would put you wait for a while and eat up a large amount of data around 15 GB in the meantime. Installing Xamarin is a time taking process. always Watch out to these options carefully else you may mess up with the installation incomplete because of network disconnections too. If you already have the Android SDK on your computer from the previous Android Studio installation, then you can choose that for your current installation using appropriate tabs. After everything completes right, you can start using Xamarin.
Once you are successfully in, you will see a getting started page. Using the solution explorer, navigate to MainActivity.cs file. If that look foreign, simply assume it to your MainActivity.java file if you are from Android Studio background. Within the generated code, you will see many similarities to Android Studio such as SetContentView. The Main.axml file which the SetContentView points to can be located under Resources > layout > Main.axml.
Voila! You don’t need another explanation. You know the rest.
Continue reading this article in the upcoming posts. It’s long and more detailed. So, let us take a little water and come back to the lesson.